Chicken Pot Pie for One or All
All You Need:
2 Tablespoons butter
2 lbs boneless skinless chicken breasts, cubed
1-2 cups frozen peas & carrots
1 1/2 cups potatoes, diced small
1 cup all purpose flour
1 cup milk
4 cups chicken broth
Salt & Pepper to taste
2 pie shells (9 inch)
Pie plate (I prefer stoneware for this recipe)
2 lbs boneless skinless chicken breasts, cubed
1-2 cups frozen peas & carrots
1 1/2 cups potatoes, diced small
1 cup all purpose flour
1 cup milk
4 cups chicken broth
Salt & Pepper to taste
2 pie shells (9 inch)
Pie plate (I prefer stoneware for this recipe)
What You Do:
In a large pot, melt the butter. Salt and pepper the cubed chicken and add to the pot. Saute the chicken until almost done. Dump the potatoes, peas, and carrots into the pot. Stir and cook until the chicken is done and the potatoes have softened. This part should take about 10-15 minutes.
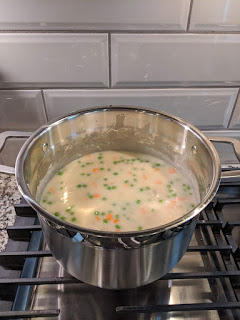
After the chicken is done, pour the flour into the pot and stir until the contents are evenly coated with flour. Add the chicken broth and stir. (To prevent sticking and burning on the bottom of the pot, you will need to stir thoroughly every few minutes.) Pour in the milk and bring to a simmer. Allow to simmer and thicken for about 15 minutes.
While simmering, preheat your oven to 400°. If using a stoneware pie dish (like this), spray some cooking spray on a paper towel and wipe the rim of the pie dish before adding the bottom crust--it helps keep the crust from sticking.
NOTE: If using a glass pie dish, you'll need to pre-bake your bottom crust for 6-7 minutes (don't forget to prick it and add pie weights or dry beans). If using a stoneware pie dish, no pre-baking is required.
Once the filling has thickened and the bottom crust is prepped, use a slotted spoon to transfer the filling to the pie shell. Fill to the brim with filling and add as much of the gravy as desired. Top with the top crust and press to seal the edges, cutting away any excess.
Using a sharp knife, cut slits into the top crust to allow for venting. Place pie dish in center of oven and bake for 30-35 minutes, covering the edges of the pie crust after 20 minutes (if necessary).
ANOTHER NOTE: As a precaution, you can lay a sheet of aluminum foil on the baking rack below the pie dish to catch any overflow or drips. Make sure you set this on a separate rack below the dish to not interfere with airflow and cooking times.
The Wordy Bit
Chicken pot pie has long been a favorite comfort food of mine. I have tinkered on and off with recipes over the years, but this one really is the best. I use regular store-bought pie crusts (they're usually on sale throughout the holiday season, so I'll buy some extras and throw them in the freezer), but this recipe could be used with your favorite pie crust recipe--as long as it's not sweet.
Oh, I said "For One or All," didn't I? You can easily divvy this recipe up for meal prep. I use these ramekin mugs, and they work great. You can even freeze the filling for meal prep! I've made full pies in the ramekins and froze them. If you do that, you'll have to heat them up slow. Pop them in a cold oven and cover them with foil. Set the oven to 350° and keep an eye on them. It should taken them about an hour to so to warm thoroughly and brown nicely. Using a food thermometer, check the temperature of the filling through one of the slits. Here's a picture from my old kitchen.
We found that (for us) the ramekins work better using a convection oven. We haven't had as much success in our new house with our conventional ovens and getting them heated through properly without scorching the bottoms.
This post contains affiliate links, and I may make a small amount of money from qualifying purchases.


Comments
Post a Comment